Edge ML Filter Plugin
The plugin takes a image saved by south plugin named webcam media, sends that to Edge ML cluster running somewhere else. The Edge ML cluster returns a response in the form of json which contains information about detected objects, their bounding boxes and confidence score. This information is appended to the readings generated from south service.
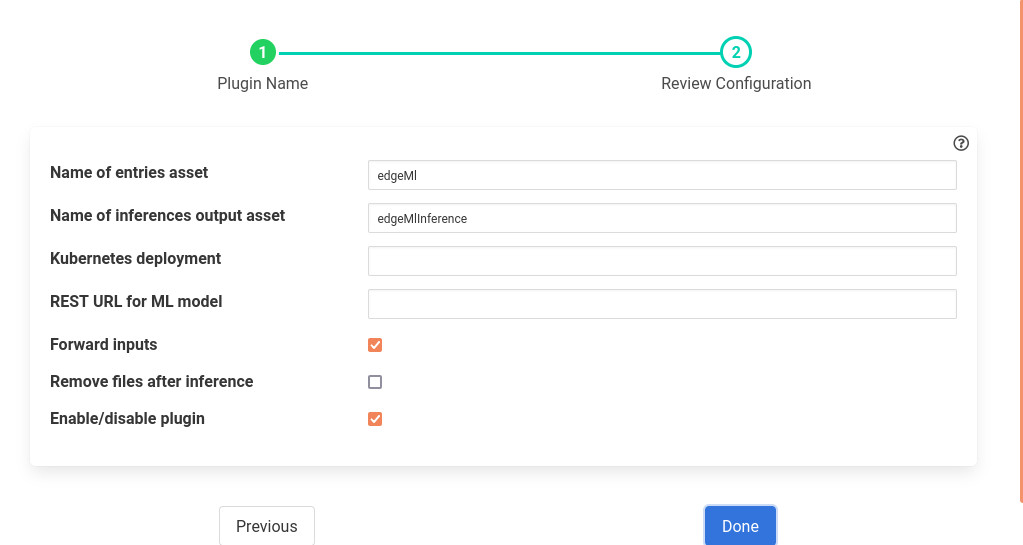
- ‘assetName’: type: string default: ‘edgeMl’:
- Name of asset to listen on; readings have path names of images to analyze. The plugin will pick these path names to read these images.
- ‘outAssetName’: type: string default: ‘edgeMlInference’:
- Name of asset to write ML inferences on.
- ‘deploymentName’: type: string default: ‘’:
- Name of Kubernetes deployment for ML model
- ‘edgeMlUrl’: type: string default: ‘’:
- REST URL for ML model which analyzes images; dynamically discovered if empty.
- ‘forwardData’: type: boolean default: ‘true’:
- Forward data as well as inferences.
- ‘rmFile’: type: string default: ‘false’:
- Remove source files after inference.
- ‘enable’: type: boolean default: ‘true’:
- Enable/ Disable the plugin.
Installation
To run the plugin you must follow these prerequisites.
- Run the south webcam media plugin.
To run the south webcam media plugin you can either
Copy some images inside some directory in FOGLAMP_ROOT/data. Let’s say the directory name is pics. Run the following command.
curl -sX POST http://localhost:8081/foglamp/service -d '{"name":"My_web_cam","type":"south","plugin":"webcam_media","enabled":false,"config":{"assetName":{"value":"WebcamImages"}, "imageDir":{"value":"pics"}, "mediaType":{"value":"directory"}, "fpm":{"value":"10.0"}}}' |Connect a camera to the machine and run the following command.
$ v4l2-ctl --list-formats-ext --device /dev/video0
You will see something like
'YUYV' (YUYV 4:2:2)
  Size: Discrete 640x480
          Interval: Discrete 0.033s (30.000 fps)
  Size: Discrete 720x480
          Interval: Discrete 0.033s (30.000 fps)
  Size: Discrete 1280x720
          Interval: Discrete 0.033s (30.000 fps)
  Size: Discrete 1920x1080
          Interval: Discrete 0.067s (15.000 fps)
          Interval: Discrete 0.033s (30.000 fps)
  Size: Discrete 2592x1944
          Interval: Discrete 0.067s (15.000 fps)
  Size: Discrete 0x0
Now we know that the id 0 is functional. If no output then try 1,2,3 and so on.
Finally launch the plugin using
curl -sX POST http://localhost:8081/foglamp/service -d '{"name":"My_web_cam","type":"south","plugin":"webcam_media","enabled":false,"config":{"assetName":{"value":"WebcamImages"}, "imageDir":{"value":"webcam"}, "mediaType":{"value":"camera"}, "cameraNumber":{"value":"0"}, "fpm":{"value":"10.0"}}}' |jq
- Start the Edge ML cluster.
For starting the Edge ML cluster you should follow this README file.
Add the filter Edge ML.
curl -sX POST http://localhost:8081/foglamp/filter -d '{"name":"edge_ml_filter","plugin":"edgeml","filter_config":{"deploymentName":"edgeml-deployment","assetName":"WebcamImages","outAssetName":"DetectionResults","enable":"true", "forwardData":"true", "rmFile":"false"}}' |jq
curl -sX PUT 'http://localhost:8081/foglamp/filter/My_web_cam/pipeline?allow_duplicates=true&append_filter=true' -d '{"pipeline":["edge_ml_filter"]}' |jq
- Finally Enable the schedule.
curl -sX PUT http://localhost:8081/foglamp/schedule/enable -d '{"schedule_name":"My_web_cam"}' |jq