Jira Ticket Creation
The foglamp-notify-jira delivery notification plugin allows notifications to be used to create tickets within Jira. The tickets are created within a specified project with a summary, description and other information supplied by FogLAMP.
To obtain an API token from Jira
Visit the Jira API tokens page
Select Create API token
Enter a name for your application, this must be unique for each FogLAMP Jira application you create
Click on Create
Once you have created your notification rule and move on to the delivery mechanism
Select the jira plugin from the list of plugins
Click Next
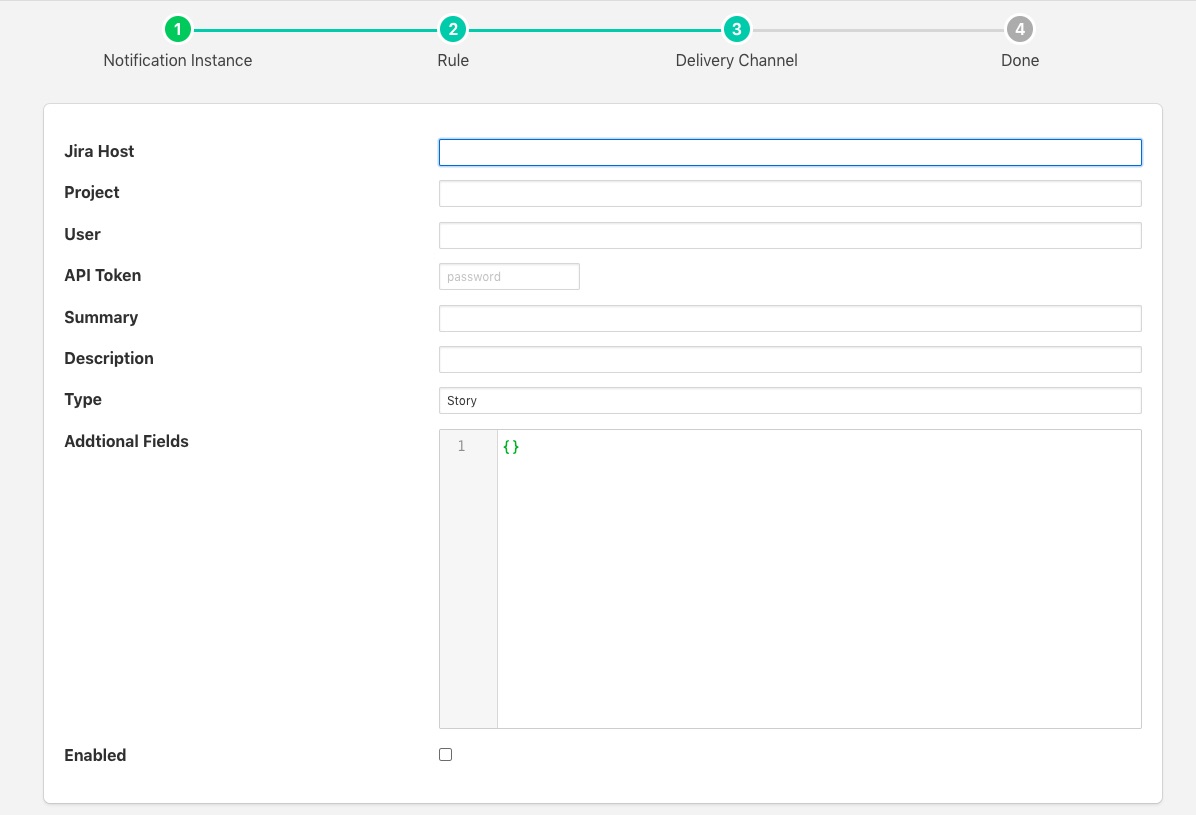
Configure the delivery plugin
Hostname: The hostname where your Jira instance is installed. This may be a local instance or a cloud instance.
Project: The project into which you are creating the Jira tickets. The project name should be the one that appears as projectKey in the URL bar when browsing the Jira boards.
User: Your Jira user name, this is the name of the account you used to create the API token
API Token: The API token you created above
Summary: The text to add into the ticket summary, this may include text substitutions (see below).
Description: The text to add into the ticket description, this may include text substitution (wee below).
Type: The issue type to create. This must be the name of one of the types that is valid for your Jira project.
Additional Fields: This is a JSON document that contains a number of key/value pairs, each of these pairs is a field name and content to add to the ticket. Text substitutions may be applied here also.
Enable the plugin and click Next
Complete your notification setup
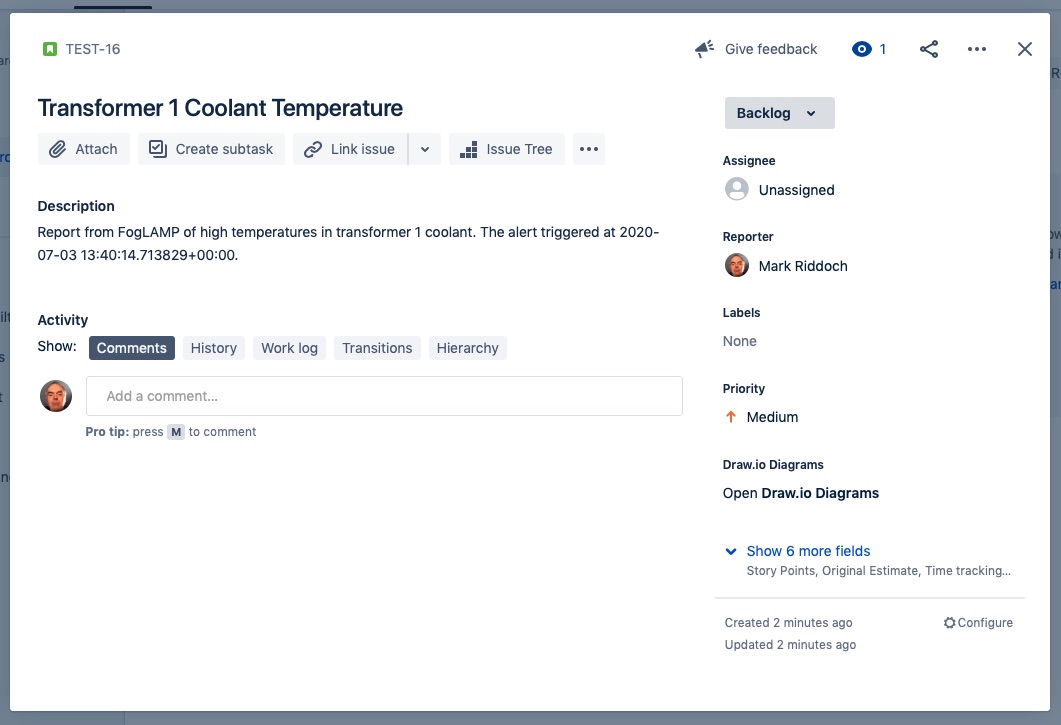
When the notification rule triggers you a Jira ticket will be created.
|
Text Substitution
Text markers may be used to substitution text with the fields in the Jira ticket. The markers supported are
%MESSAGE%: this is replaced with the message generated in the notification system
%REASON%: this is replaced with the reason for the notification, it may be the string triggered or cleared.
%TIMESTAMP%: this is replaced with the timestamp of the reading data that caused the notification to trigger.